Originally published on 1 January 2026
Last updated on 13 January 2026
This is a continuation of the “Inclusive Tools” series. This post may refer to content from the post titled “Inclusive Tools Week 1 + Introduction“.
Content
Content Objectives
- What happened during this session? What did I learn (bolded)?
- Areas for improvement of peeler veg/fruit holder V1
- Creation of peeler veg/fruit holder V2
Table of contents
- What Happened During the Sesison
- Creation of peeler fruit/veg holder V2
- CAD file & Images
- Problems Identified
- Problem Solving
- When no fruit/vegetable is mounted, the handle falls to either side
- The force from peeling often causes the axle to rotate
- The base of the housing is too slippery
- It is difficult to pick up the handle when it's resting on the table, especially with a stump + The axle is difficult to hold in position with a stump
- "Skewering" the fruit/vegetable into the fork is awkward
- Testing
What Happened During the Sesison
When the session began, our user, Alpha (not their actual name) entered. It was at this point that I realised that they had not lost all their fingers, it was only their right hand that was missing fingers.
So, though the other volunteers had created a stump mount and peeler attachment for their right hand, given that it was a lot easier (and effective) for Alpha to just use a peeler with their fully functional left hand, they did just that. This taught me about the importance of not just understanding our users’ disabilities but also their abilities, and taking advantage of them. That being said, our peeler mount and attachment would still be incredibly useful for someone who was missing fingers on both hands.
Afterwards, the volunteers began giving Alpha the chance to test other cooking attachments. However, the diameter of the oval-shaped mount they had made was actually slightly too small for Alpha’s stump. Shucks, this means we have to go back and re-print a slightly bigger version right? Wrong! I watched as they pulled out a heat gun and began to mould the mount to better fit the shape of Alpha’s stump, effectively increasing its diameter. Turns out PLA can be easily moulded with a heat-gun.
Towards the end of Alpha’s testing of the peeler and other cooking attachments, I was waiting for the “perfect chance” for me to show them my prototype fruit/vegetable holder. However, it never came. At some point in time, I realised they were wrapping up and I was still yet to show them my prototype. Thus, when I finally brought it up, they had already kept away their peeler attachment. All I could do was demonstrate it to them. This was a poignant reminder that I can’t keep waiting for the “perfect opportunity” and have to create it for myself.
There were some problems I had already noticed the moment I assembled the prototype. I had planned to have just enough clearance between the fork axle and housing for them to remain in place when let go. However, in reality, the clearance between the fork axle and housing was too large both along their diameter and length, meaning when no fruit/vegetable was mounted, the handle would fall to either side. The other issue was that the base of the housing was too slippery – rotating the fork axle would often result in the entire housing shifting too.
During testing, we discovered other issues too. If the axle’s handle was not being held on to, the force involved in peeling a fruit/vegetable would often cause the axle to rotate too. Additionally, when the handle was resting on the table, it was difficult to pick up. Given the current handle design, the axle was also difficult to hold in position with a stump, because one could not stop the handle from falling away from your hand. The initial action of “skewering” the fruit/vegetable into the fork was also awkward and required considerable force too. Additionally, if the user’s hand slips, they may get cut by the fork’s prongs.
All these discoveries validated the idea that it’s better to find out what works best through testing than trying to predict while designing. I would not have known most of this without a) testing or b) spending an inordinate amount of time doing calulations to emulate such testing.
Throughout the course of this session, I learnt about my character too. At times, I found myself becoming a bit “defensive” about my design and reluctant to make difficult-to-implement changes. For example, regading the issue of the axle rotating during peeling, one of Alpha’s family members suggested that I implement a mechanism that enables the axle to “lock” in place at specific angles (similar to a fan’s speed dial). My first instinct was to suggest that it was not wise because doing so would prevent the axle from sliding vertically up-and-down. However, in reality it was indeed possible to implement a system with both angle-locking and vertical sliding. Additionally, they had raised the point that tighter tolerances between the axle and housing may not be enough to stop the axle from rotating while someone peels. I am reminded of the importance of separating one’s ideas from themselves, and not conflate comments made on my ideas as on myself.
The last lesson I learnt from this session was the importance of making safe tools. Though you and I may happily hold a fruit while operating a peeler inches away, that may not be the safest for someone with limited mobility/dexterity. Thus, why the fruit/vegetable holder was not just a tool, but also a safety device.
I also discovered that the 2mm tall slot I had made in the TPU axle for forks created a good, firm fit.
Additionally, Alpha mentioned that they had trouble wringing towels dry since they were not able to grab the other end of the towel with their right hand. Subsequently, some of the other volunteers started working on this problem statement.
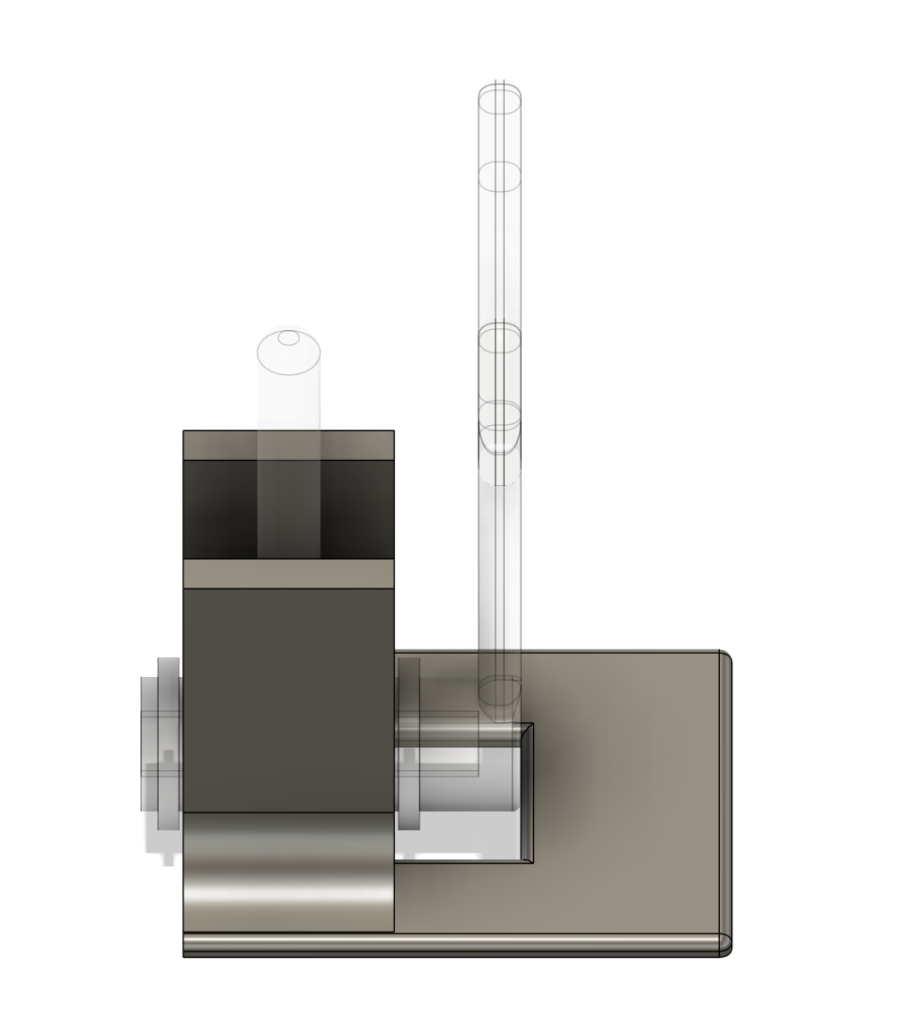
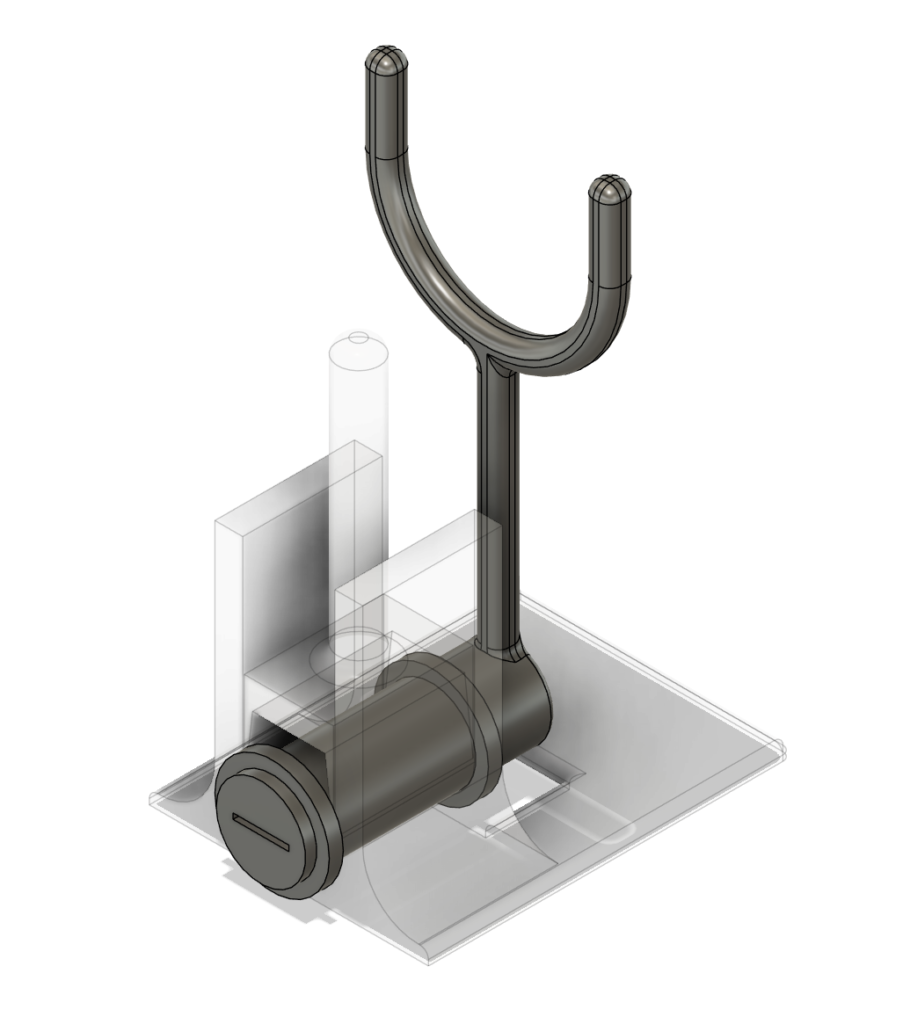
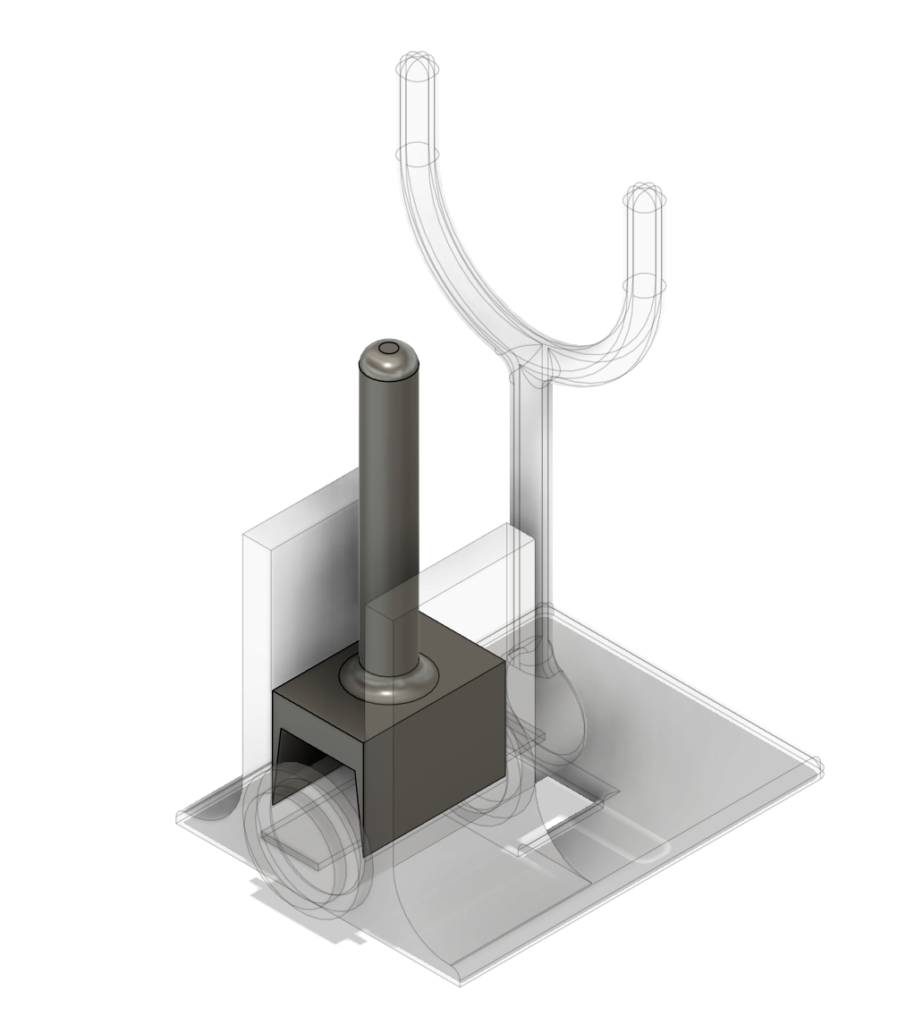
Creation of peeler fruit/veg holder V2
CAD file & Images
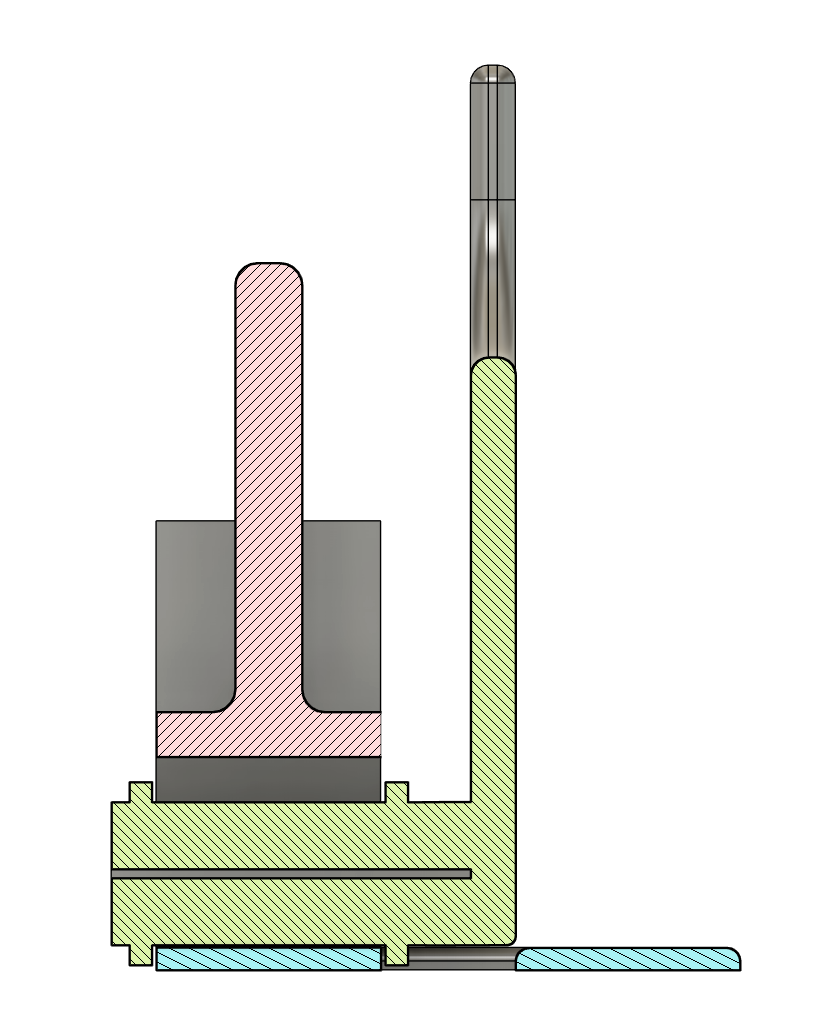
Problems Identified
- When no fruit/vegetable is mounted, the handle falls to either side
- The base of the housing is too slippery
- It is difficult to pick up the handle when it’s resting on the table, especially with a stump
- The axle is difficult to hold in position with a stump
- “Skewering” the fruit/vegetable into the fork is awkward
- The force from peeling often causes the axle to rotate
Problem Solving
When no fruit/vegetable is mounted, the handle falls to either side
At the core of this is torque. The weight and length of the long handle translates into a moment, creating a net torque on the axle and causing it to rotate till the handle hits the table. I could either reduce this moment or counteract it with another one. Given a handle is required either way, counteracting it seems easier.
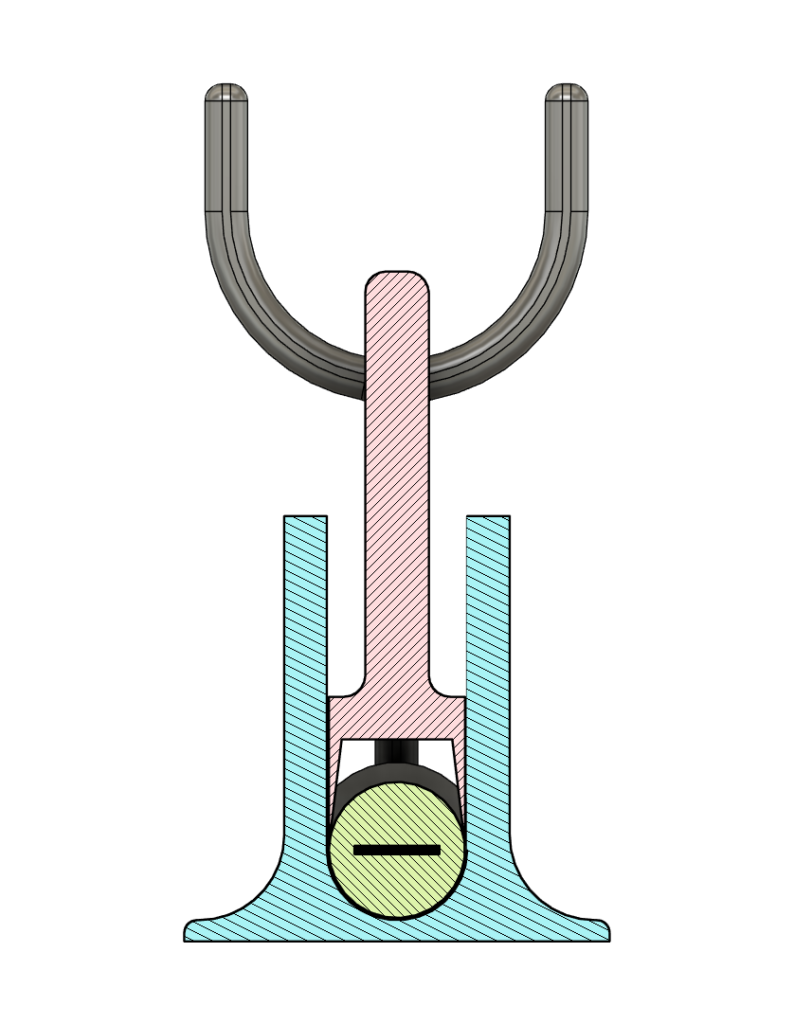
I thought the easiest method to do so would be to increase the counteracting moment from friction between the axle and housing. Thus I reduced the clearance between them from 2mm to 1mm on all sides. To explain how this increases the force from friction, we must first view the flexible TPU axle as consisting of many springs. When we reduce the clearance between the axle and housing, the axle has to deform more when it fits into the housing. Thus, all these “springs” are compressed by a greater distance and exert a greater elastic force against the walls of the housing. As a result, the housing exerts a greater magnitude of normal force on the axle and since (i.e. ), there is a greater counteracting moment on the axle from friction.
To further resolve this problem, I could embed weights on the opposite side of the axle. However, given this is not a high-impact issue, it may be appropriate to just implement a half-fix. This half-fix comes in the form of a solution to the next problem (The force from peeling often causes the axle to rotate).
The force from peeling often causes the axle to rotate
To solve this, the user needs to be able to lock the axle in it’s current position. A mechanism that allowed the axle to “lock” at certain angles, similar to the multiple-position rotary switch you might see on a fan was a possible solution. However, I opted for a more simplistic one: a stopper that uses a wedge to jam itself between the axle and housing.
The base of the housing is too slippery
My first instinct as to how to solve this problem is to simply make a wider base. More surface area = more friction right? However, if we go back to the (albeit simplified) equation of , surface area actually doesn’t actually play a role here. The reason being that while increasing surface area increases the contact area, it also reduces force per unit area (ie pressure). Thus, there is no (significant) net change in friction force.
So, what can I do? Since is constant, we can only change . Thus, I should stick a non-slip material onto the bottom of the housing. That is, it needs to be able to resist shear force. So, I went down to my nearest hardware store in search of non-slip materials. While browsing, I noticed a product which claimed to work like double sided tape but could also be re-stuck. I bought some to try and found that it worked like a charm. This gecko/nano tape claims to work by mimicing a gecko’s feet, however upon further research, this may not necessarily be the case.
It is difficult to pick up the handle when it’s resting on the table, especially with a stump + The axle is difficult to hold in position with a stump
Both of these issues relate to the handle, thus I have grouped them together. To make the axle more easily held in place with a stump, we must make a handle that contacts the stump on both sides, such that normal force can act against both the forward and backward movement of the handle. The original idea we ideated during the session was an O-shaped handle which the user would place their stump in. However, while CAD-ing, I realised having a “U” shaped handle would make it easier for the user to place their stump in the handle without compromising on its function. So I did just that.
“Skewering” the fruit/vegetable into the fork is awkward
The goal here is to make it comfortable to create a force directly opposite in direction to the force exerted by the fruit/vegetable on the fork. I thought adding a large wall to the enclosure for the user to push against would be too bulky so I added a platform for the user to press down on, using friction between the enclosure and table it’s on to provide that opposing force.
Testing
Read about it in the next post in this series!
Leave a Reply