Originally published on 29 December 2025
Last updated 1 January 2026
1 January 2026: Link to “Inclusive Tools Week 2” post added under “Test”
Contents
Content Objectives
- What is SalvageGarden and their MakeIT sessions?
- What happened during this session? What did I learn, engineering-related and not (bolded)?
- Creation of peeler veg/fruit holder V1
Table of Contents
Background
Recently, while attending the Enabling Lives Festival, I discovered SalvageGarden, an “assistive tech makerspace”. While chatting with their booth’s presenters, they shared about their weekly Make Inclusive Tech (MIT) Sunday sessions. I immediately fell in love with the idea: open sessions where persons with disabilities (PwDs) and maker-DIYers come together and collaborate to create enabling tech/tools. Fortunately it was a Saturday, so the very next day, I joined one of their four nationwide sessions.
What happened
When I first entered, I was pleasantly surprised by how “home-grown” and informal everything was. We indicated our attendance by writing down our names on a sheet of paper, and walk-ins were welcome. Unlike many of my previous volunteering experiences, there was no volunteer manager strictly delegating work. In fact, when I asked a SalvageGarden volunteer if they wanted me to work on a certain project, he told me that there was no “me” and “them”. I was part of SalvageGarden, and if I wanted to work on a project, that’s what I would do.
The session itself began with a brief introductory sharing about SalvageGarden and the MIT Sundays initiative. This included time for us to try the “spread” of 3D printed inclusive doodads they had laid out in front of us – from tic-tac-toe for the visually impaired to a prototype 3D-printed prosthetic hand. It also included a brief introduction of the work they set out to do that day. One of the items on the agenda was testing out a tool for a PwDs to peel fruits and vegetables independently.
Testing the peeler tool
Problem Statement
I believed we were designing for an end user (who I will refer to a Alpha) who did not have any fingers and a stump at the end of their hands*. I was told that their goal was to be able to peel fruits and vegetables independently.
* during the next session, I would find out that they actually had their fingers on their left hand
The prototype (peeler mount+attachment)
The prototype was entirely 3D printed. It consisted of a “mount” that attached to the stump. To ensure it attached securely, it utilised a combination of a lever-shaped “spring”, which pushed against the side of the stump, and a clasp, which adjust the overall circumference of the section of the mount surrounding the stump. It was interesting to see such a use of 3D printed PLA as a compliant mechanism.
The mount had a peg-shaped multi-purpose connector designed into it. They had made an array of attachments consisting of a matching multi-purpose connector on one side and a utensil, such as a fork or spoon, mounted on the other side. In this case, we were working with a peeler attachment.
Testing
Subsequently, they got to work. Since the PwD they were designing for would only be attending the subsequent week’s MakeIT session, they tried using their tool without their fingers. We toyed with two types of peelers that mounted the blade in different orientations:
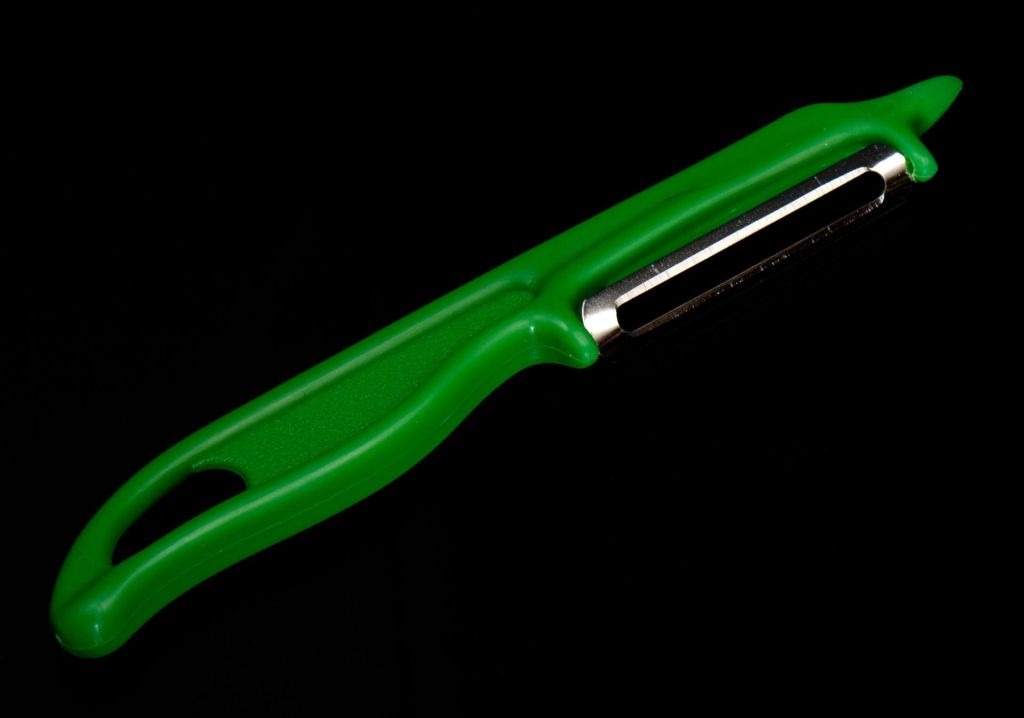
Source: Peter Halasz – https://commons.wikimedia.org/wiki/File:Peeler_02_Pengo.jpg
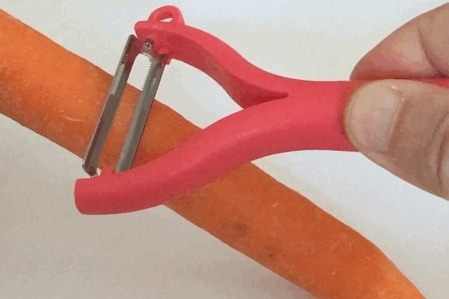
Source: Joho345 – https://commons.wikimedia.org/wiki/File:Benutzung_eines_Kartoffelsch%C3%A4ler.gif#file
Both peelers’ attachments had the handle of the peeler mounted below the hand and oriented parallel to the arm. I found the peeler with the blade’s axis perpendicular to the handle easier to use. This was possibly because the perpendicular-mounted peeler required downwards force whereas the parallel-mounted peeler required sidewards force, and it’s easier to exert downwards force with a hand.
While this mount + peeler attachment seemed to work quite well, one of the issues we encountered while testing the peeler was the fruit/vegetable we were peeling sliding around. We had not prepared any tool for this yet, so I adopted this as my own project.
Creation of Peeler Fruit/Vegetable Holder V1
Define
The primary problem here was the fruit/vegetable being peeled sliding around. Thus, our solution needed to be able to hold the fruit/vegetable firmly in place with minimal movement.
Ideate
The other volunteers and myself started throwing ideas around. Perhaps something similar to a claw-style hair clip with its opening facing upwards? Perhaps mounting a fork sideways would work? As the discussion went on, I discovered a core tenet of these designs: (untreated) 3D printed parts are not food safe. And it wasn’t because of any sort of chemical leeching out, their primary concern was microbes growing in the crevices between 3D-printed layers. Thus, though their tools for cooking and eating are mostly 3D-printed, the 3D-printed parts never actually came in contact with the food. Instead, each design used a food-safe item (such as a spatula, fork, or peeler) secured in a mount.
As the other volunteers and I continued to share our ideas and discuss which would work best, one of the other volunteers stopped us. He mentioned how, instead of spending all our time thinking and discussing, it would be more productive if we simply prototyped our designs and tested them. As someone who has always spent a significant amount of time deliberating every detail of their designs, however important or unimportant, this stuck with me.
My subsequent experiences have taught me that, when faced with multiple valid design options and provided with the opportunity to iterate, it’s often wiser to find out what works best by testing prototypes than trying to predict during the design stage. Testing provides more accurate results than such prediction (e.g. discovering design flaws you’d only notice through testing), often saving you time overall. Thus, I simply went ahead with designing the prototype I had in mind.
Prototype
CAD file & Images

Prototype Design Process
In compliance with the aforementioned principle that 3D-printed parts should not come in contact with food, I opted to have an ordinary fork be the interface between my design and the fruit/vegetable being peeled.
Regarding the fork’s mount, besides securely holding the fork in place, I also wanted it to be compatible with most shapes of forks and be as simple to use as possible. Thus, I thought of using a flexible 3D-printed part to “grip” the fork’s handle. I implemented this using TPU, a common flexible 3D-printing material, and a slot in my design to insert the handle into.
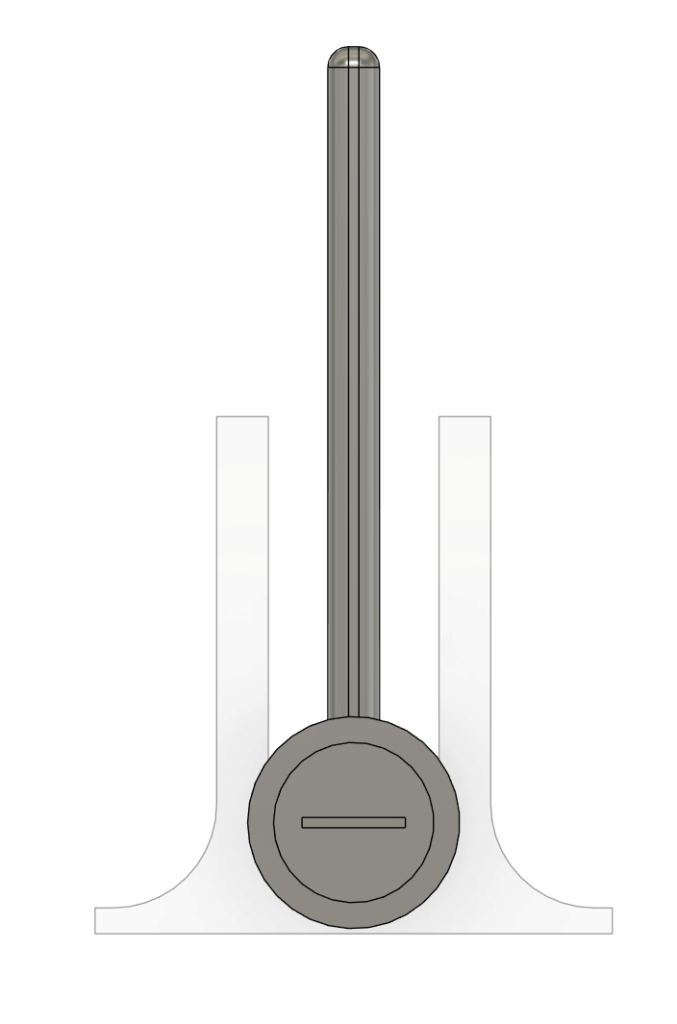
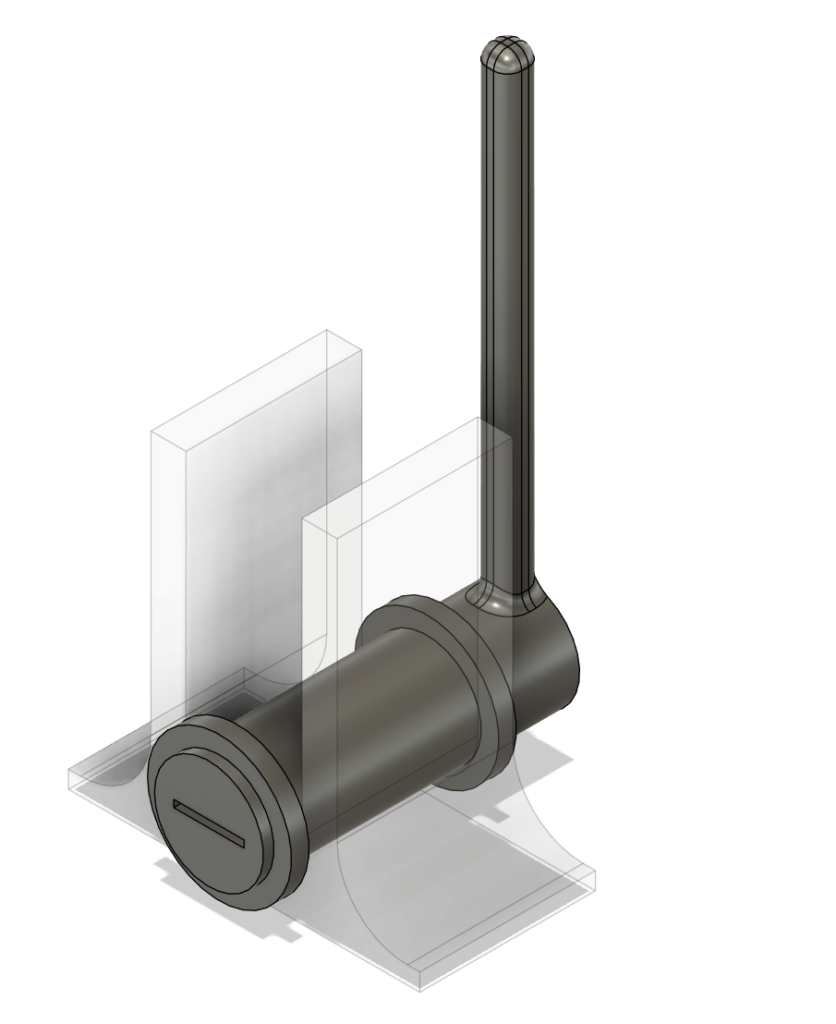
In addition to holding the fruit/vegetable in place, I also wanted my design to enable the user to rotate the fruit/vegetable. That way, they would be able to peel its’ entire surface without having to reinsert the fork. However, the vertical distance between the bottom of the fruit/vegetable (which rests on the cutting board) and the fork’s handle varies with the fruit/vegetable’s diameter and its orientation (even if the fork was inserted perfectly in the fruit/vegetable’s centre, the fruit/vegetable’s profile isn’t perfectly circular). Thus, the fork’s axis of rotation needed to be able to move vertically. To achieve this, my prototype consisted of two elements: an axle and a enclosure.
The axle’s purpose is to allow the fork to rotate the fruit. Thus, it contains the slot to insert the fork into and is circular in shape. The enclosure enables the vertical movement of the fork while preventing movement in the other dimensions.
Test
Read about it in the next post in this series!
Leave a Reply